Container stability
Flat bottles need consistent orientation and guide control so labels do not skew as the bottle moves through the conveyor.
Flat bottle labelling
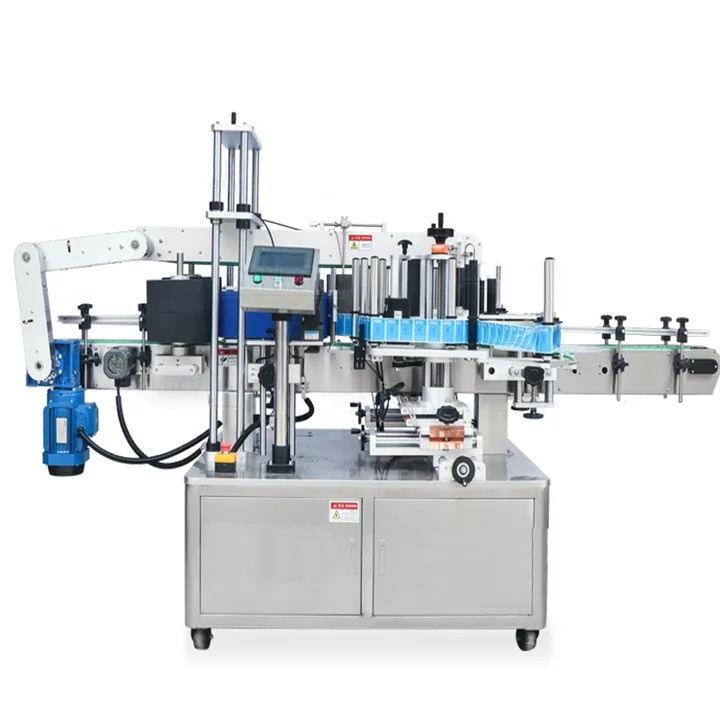
Flat bottles need controlled presentation through the labelling station so front and rear labels land squarely on the correct panel. A twin-side labeller uses side labelling heads with guide rails and hold-down control to apply two labels during one pass.
Selection points
Flat bottles need consistent orientation and guide control so labels do not skew as the bottle moves through the conveyor.
Front and back label start points need setting around bottle face, label gap, sensor type and product speed.
Width, height and pressure settings should be easy to repeat across different SKUs and label sizes.
Related routes
Use these pages to compare similar pack formats and label application routes.
Front and rear labels on flat and rectangular containers.
Controlled labelling for shaped and oval packs.
Separate front and back labels rather than full wraparound.
Top, bottom and face labelling for flat products.
Send your pack dimensions, label size, label material and output target. Lancing UK can help shortlist the most suitable front/back labelling route.
Flat bottle engineering
A flat-sided bottle can still include shoulder taper, heel radius, mould seams, recessed panels or flexible walls. The front and back label positions should be defined from repeatable pack features and kept clear of transitions that prevent even wipe-down.
Side guides establish the product path, while side belts or pressure devices can stabilise the bottle through the dispense and wipe-down zones. The contact area should be chosen so the container remains upright without being squeezed or deflected. Tall, narrow or partly filled bottles may need additional control because their centre of gravity can move during acceleration.
When the front and back labels differ in length, each applicator should be set independently while both positions refer to the same bottle datum. The label trigger, dispense delay and wipe-down should be checked at normal product spacing, not only with isolated bottles placed by hand.
Existing labelling-machine photograph. Agree fixed pack datums and horizontal and vertical placement limits, then measure both labels on production samples.
| Panel feature | Specification or trial question |
|---|---|
| Flatness and recess | Does the label contact one continuous surface, or must it bridge moulding, embossing or a recessed panel? |
| Shoulder and heel transition | How much clearance is needed above and below the label so its edges remain on a stable surface? |
| Side radius | Can the label be fully wiped down before the panel curves away, and is the artwork positioned within that usable width? |
| Mould seam or container joint | Will a label edge cross a seam that changes adhesion, appearance or barcode readability? |
| Bottle rigidity | Can side-belt and wipe-down pressure be applied without squeezing the pack or changing the label datum? |
| Guide contact zone | Is there a consistent area for rails or belts that does not touch a pump, trigger, handle or the intended label? |
| Coding and inspection | Where will variable data be printed, how will it be checked and can the reject system remove an incorrectly labelled pack? |
Flat bottle questions
Yes, twin applicators can be configured with separate label rolls and independent positions. Both label specifications and the required relationship between them should be supplied for the trial.
There is no single universal minimum. The usable area depends on label dimensions, side radius, shoulder and heel transitions, wipe-down method and the container material, so a drawing or production sample is needed.
Each material can be considered, but rigidity, surface finish, weight and friction affect guide pressure, side-belt contact and adhesion. The intended production container should be tested.
Yes, coding, barcode or label-presence inspection can be planned with the labeller where the required print area, controls, product spacing and reject method are defined during line specification.
Labelable panel review
A flat-sided bottle may still have a recessed panel, mould seam, rib or edge radius that limits the area available for reliable wipe-down.
| Panel edge | Keep the label clear of abrupt radii unless the label construction and wipe-down have been trialled across the transition. |
|---|---|
| Recess | Confirm the applicator can press the label into the panel without the surrounding rim blocking contact. |
| Mould seam | Mark raised or irregular seams on the drawing and avoid placing critical print or barcode areas over them. |
| Flexible wall | Test filled and empty states where guide or wipe-down pressure can change the surface shape. |
Panel design questions
A nominally flat bottle still needs usable panel boundaries that keep the label away from abrupt radii, seams and unstable surfaces.
There is no universal edge distance because label stiffness, adhesive, bottle curvature, mould tolerance and wipe-down method all affect whether the label remains flat. The label should sit inside a panel area that can be contacted consistently without forcing the material over an abrupt change in geometry.
Confirm the boundary with a drawing and production-equivalent samples.
Non-parallel panels can require different head angles, guide references or label positions on each side. Using one nominal centreline for both faces may create a visually unequal result even when each head repeats accurately.
Treat the two faces as separate applications, record their datums independently and verify the pack remains controlled between them.
It may be possible when the label fits inside the recess, the panel is sufficiently regular and the wipe-down device can contact the material progressively. Problems arise when the label crosses the recess wall or the applicator first seals the perimeter and traps air beneath the centre.
Use the final label construction and bottle samples to prove the application sequence.
Keep critical label edges, barcodes and small text away from raised seams, ribs and embossed features where possible. These features change contact pressure and can create local lift, bubbles or visible distortion.
If the artwork must cross them, include the worst production samples in the trial and agree what visual finish is acceptable before ordering the machine.